
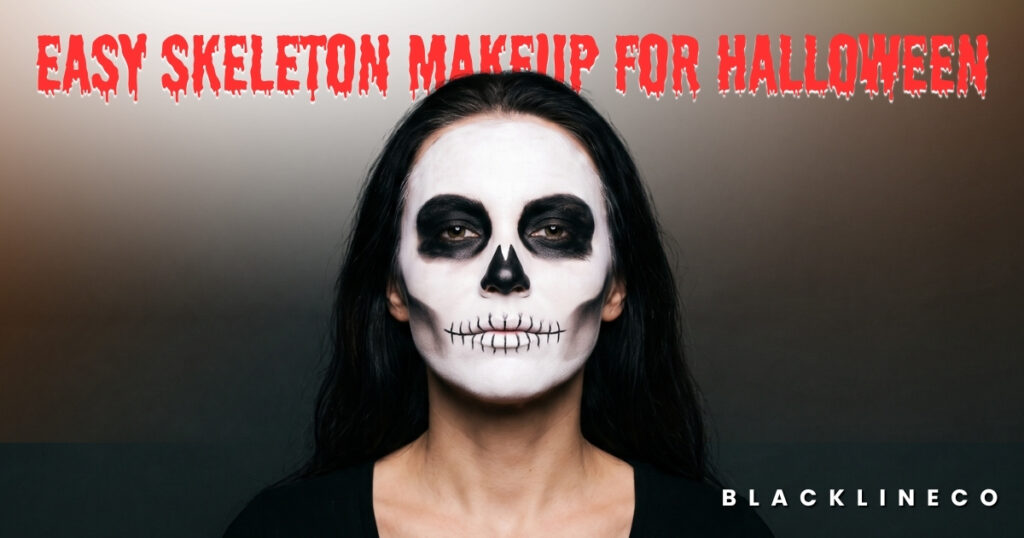
Easy skeleton makeup is one of the best Halloween looks when you want something recognizable, dramatic, and achievable without professional-level skills. You only need a few black-and-white makeup products, a little patience with the teeth, and a willingness to embrace imperfect lines.
The good news is that a skeleton look does not need to be perfectly symmetrical to look good. In fact, slightly uneven shading and hand-drawn teeth can make it look more realistic—or more spooky. This beginner-friendly skeleton makeup tutorial shows you how to create a classic black-and-white skull face, then adapt it into a cute, glam, scary, half-face, or minimal look.
What you need for easy skeleton makeup
Before starting, gather your products and keep a few cotton buds nearby for cleanup. You can create a quick skeleton face with face paint, regular makeup, or a mixture of both.
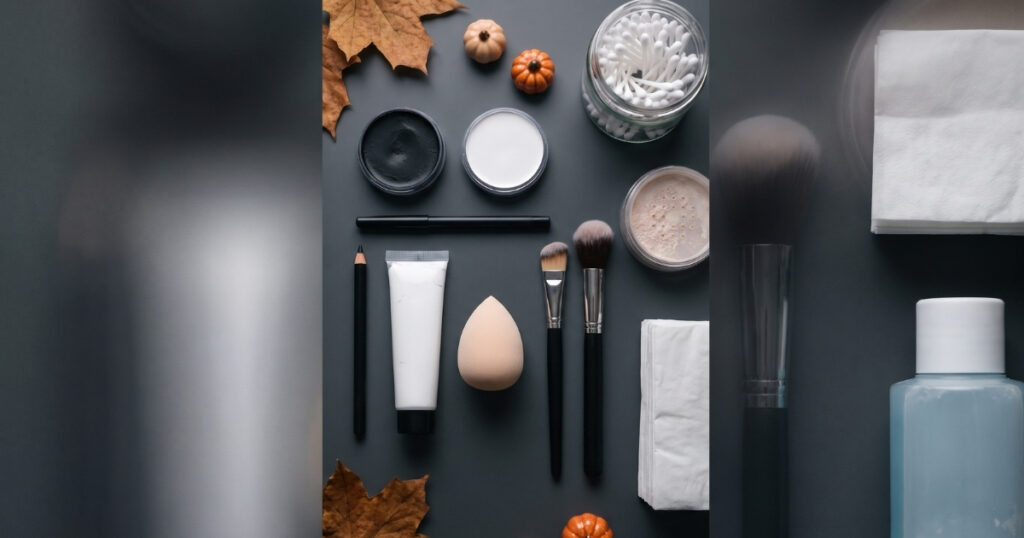
Basic products
- White face paint, white cream makeup, pale foundation, or white eyeshadow
- Black face paint, black cream makeup, black eyeliner, or black eyeshadow
- A small angled brush or eyeliner brush
- A fluffy eyeshadow brush for blending
- A makeup sponge
- Setting powder or translucent powder
- Makeup remover, cleansing balm, or micellar water
- Cotton buds and tissues for correcting edges
If you have very little time, focus on the three features that make the look instantly readable: dark eye sockets, a black nose, and skeletal teeth drawn over the lips.
For makeup around your eyes, always check the product label first. The U.S. Food and Drug Administration warns that some face paints and novelty cosmetics are not intended for use near the eye area, even if their packaging images suggest otherwise. Keep products out of your eyes and use only products labelled for that area.
Easy skeleton makeup step by step
This easy skeleton makeup tutorial uses a classic white base with black detailing. It works for Halloween parties, costume events, themed photos, or a last-minute skull costume.
1. Start with clean, Moisturized skin
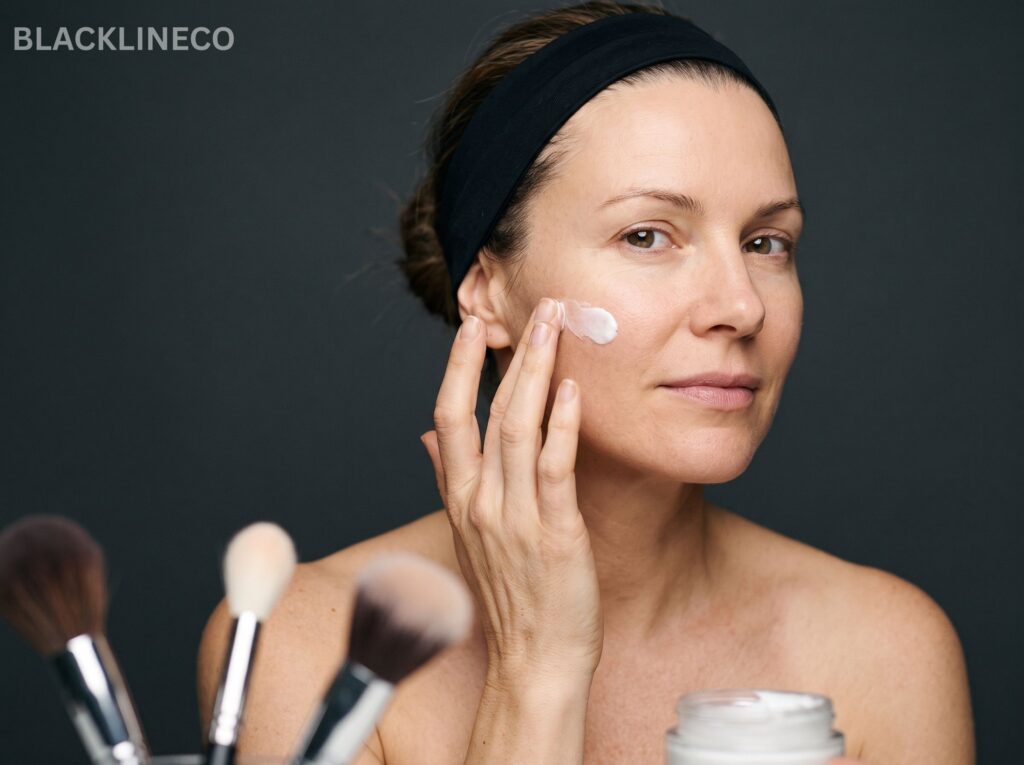
Wash your face and apply a lightweight moisturiser. Let it sink in before adding makeup.
A smooth base gives face paint and cream makeup something even to sit on. If your skin gets oily, use a small amount of primer or set the centre of your face lightly with translucent powder before you begin.
Do not apply a heavy white base just yet if you prefer a more wearable look. You can build the black skull features first and add white around them later.
2. Apply your white skeleton base
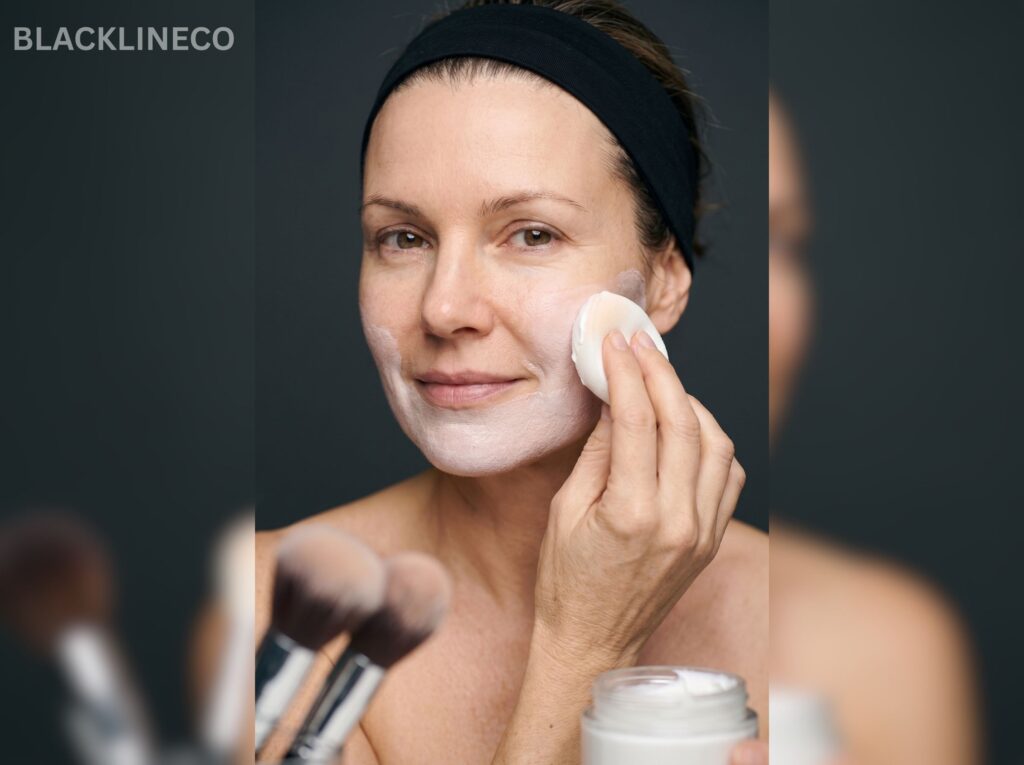
Use a damp makeup sponge to press white face paint or cream makeup over your face. Keep the layer thin rather than applying one thick coat, which is more likely to crack as you talk, smile, or eat.
Leave a little natural skin showing around the hairline if you want a softer finish. For a more dramatic Halloween skeleton makeup look, take the white base down the jawline and onto the upper neck.
Set the white product with translucent powder. This step makes a big difference: it reduces shine and helps stop the base from transferring onto clothes, hands, or a costume collar.
Quick tip: If you do not own white face paint, use your lightest foundation or concealer as a soft base. The result will be less theatrical but still clearly skeletal once you add deep black eyes, a nose cavity, and teeth.
3. Create the black eye sockets
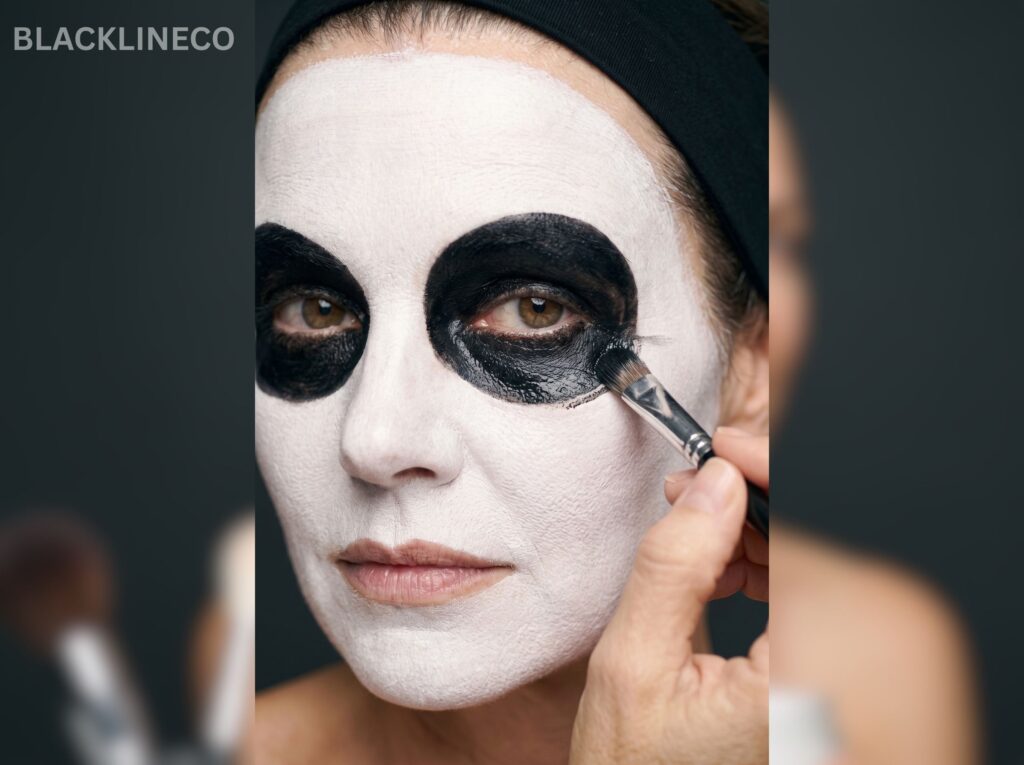
Use a black eyeliner pencil, black cream shadow, or black face paint to sketch around both eyes. Make the shape larger than your normal eye area, extending it slightly above the crease and below the lower lash line.
Do not worry about matching both sides exactly. Aim for rounded or slightly hollow oval sockets that follow your natural bone structure.
Fill in the outlined area with black makeup, then soften the upper edge with dark grey or brown eyeshadow. A common skeleton technique is to fill the eye hollows with black cream makeup; adding a little grey around the edge can make the sockets look deeper instead of flat.
If black feels too harsh for daytime photos, blend dark brown, charcoal, plum, or deep purple around the outer edge. This gives you an easy glam skeleton makeup effect without changing the main design.
4. Draw the skeleton nose
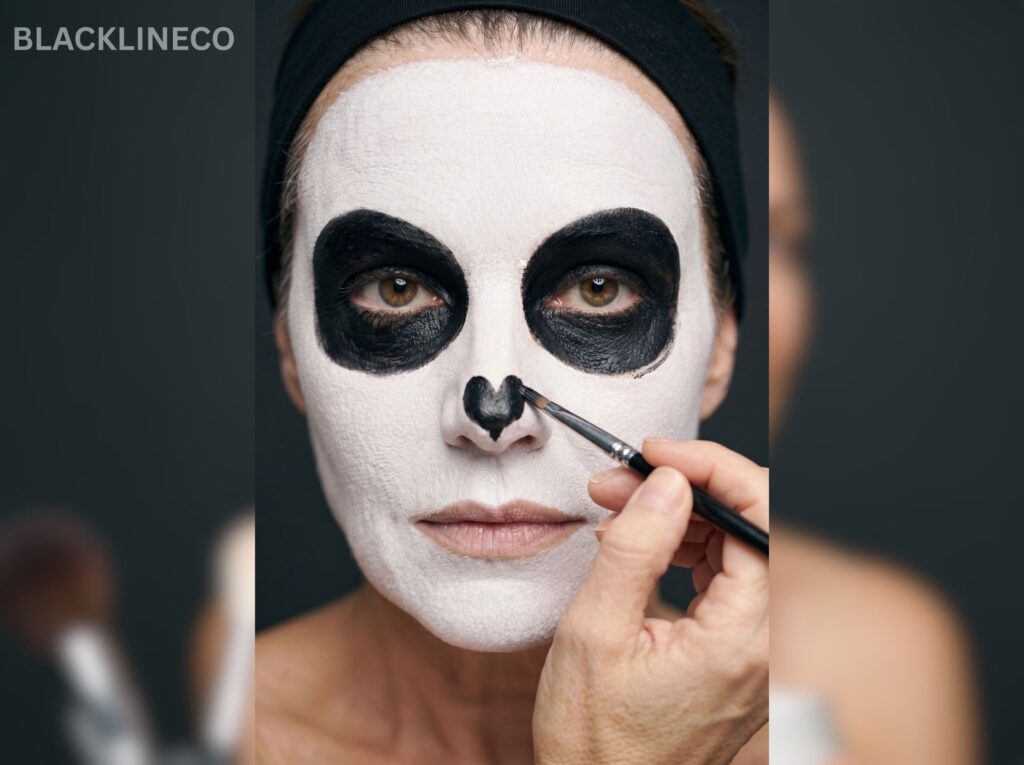
The nose is small but powerful. It immediately changes a painted face into a skull.
Draw a small upside-down heart, rounded triangle, or narrow teardrop shape on the tip and sides of your nose. Fill it with black makeup. Extend it slightly toward the nostrils if you want a more hollow, skull-like finish.
For a softer cute skeleton makeup look, make the nose smaller and rounder. For a scarier version, add a thin black line from the nose cavity upward between the brows or downward toward the upper lip.
5. Shade the cheekbones
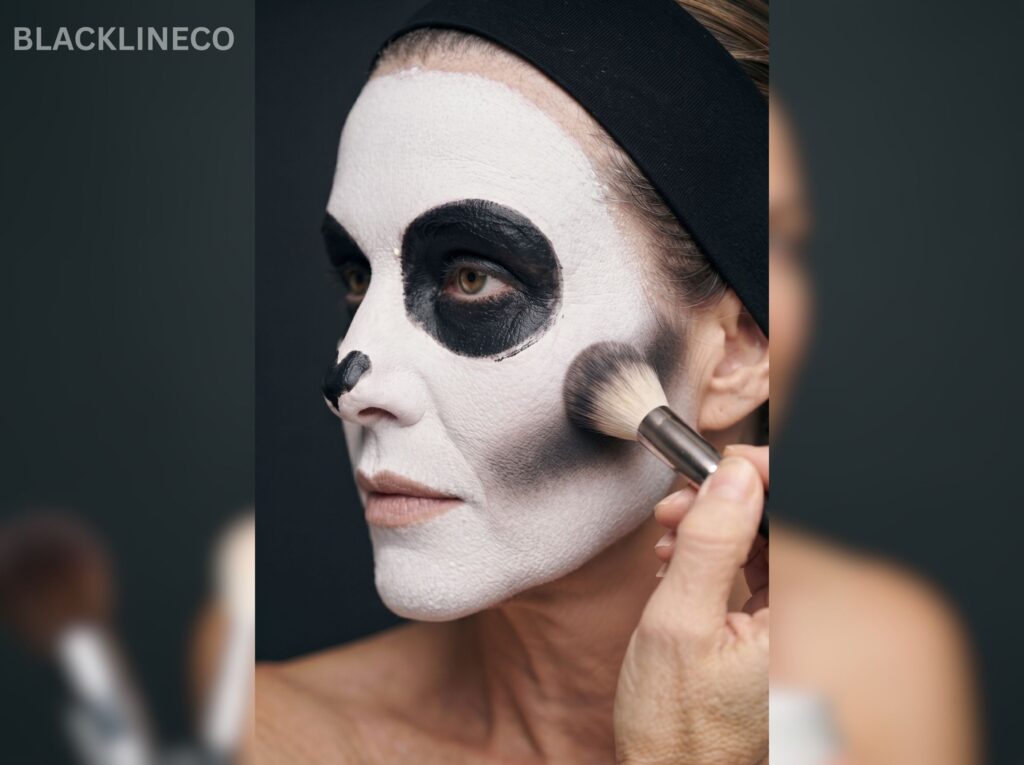
This is where your skeleton begins to look sculpted rather than cartoonish. Use black, grey, or dark brown makeup underneath your natural cheekbones.
Start near the ear and sweep toward the corner of your mouth, but stop before reaching it. Blend the colour downward and outward so it looks like a hollow beneath the cheekbone.
You do not need sharp contouring. A smoky, slightly uneven hollow usually looks better in photographs than one hard line. If you want a quick and easy skeleton makeup look, this step can stay simple: one blended dark shadow under each cheekbone is enough.
6. Draw easy skeleton teeth
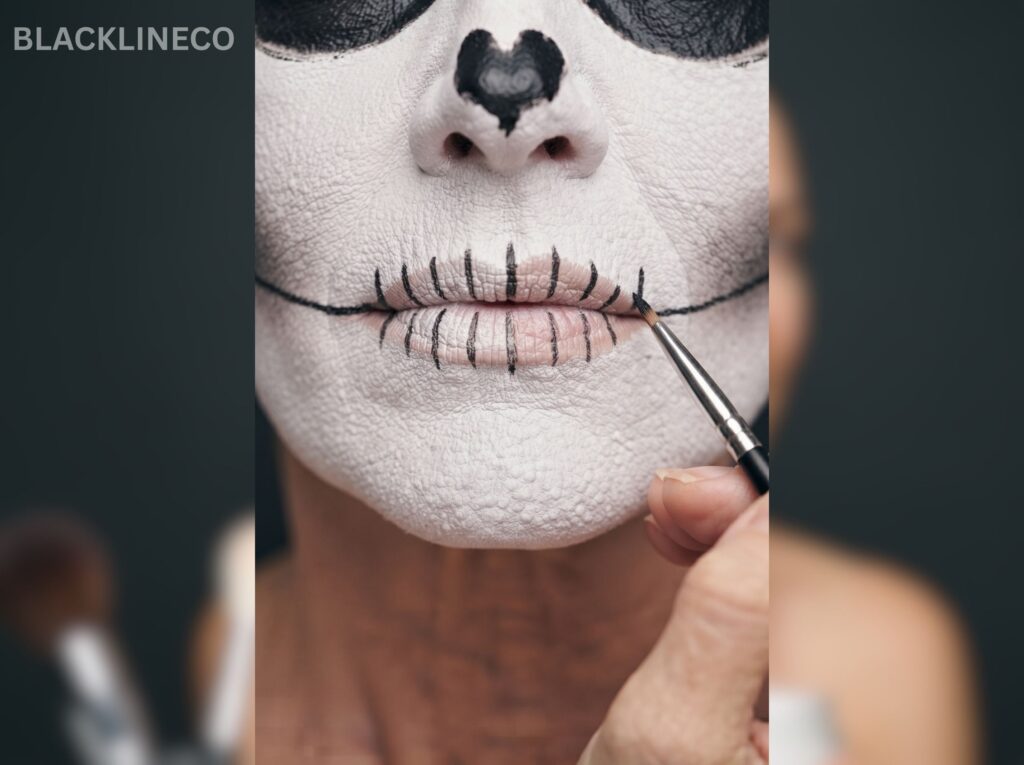
The teeth are often the part beginners overthink. Keep them simple.
First, draw a horizontal black line across closed lips. Extend the line a little beyond each corner of the mouth to suggest a wider skeletal jaw. Then add short vertical lines crossing the horizontal line—these become the teeth.
Make the lines shorter near the corners and a little longer at the centre. Avoid making every tooth identical. Natural-looking variation gives the mouth more character.
For a stronger jaw effect, draw a curved black line beneath your lower lip and trace the contour of your chin. Add a few short vertical marks between the lip line and chin curve to suggest lower teeth.
A basic skull tutorial typically uses a dark chin line, color across closed lips, extends the mouth line past the corners, then adds small vertical lines to form the skeletal jaw.
7. Add forehead cracks and facial shadows
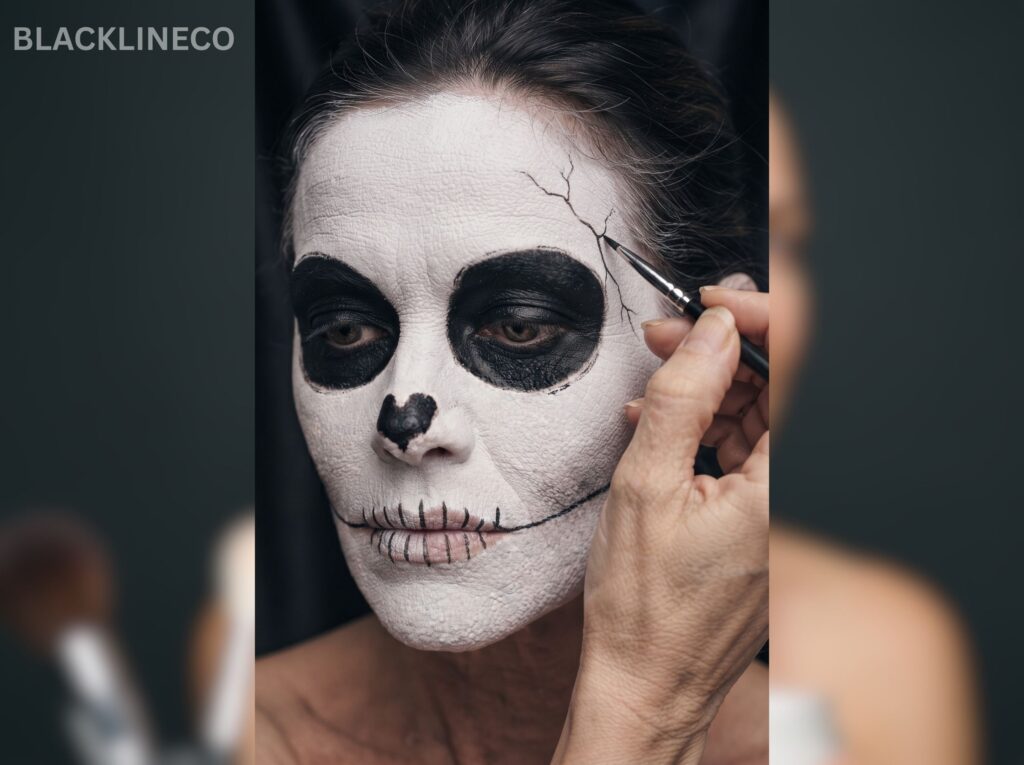
This is optional, but it makes a simple skeleton makeup look feel more complete. Use a fine eyeliner brush or black liner to add:
- Short crack lines near the temple or forehead
- Tiny vertical marks along the jawline
- Shadow beneath the lower lip
- Dark shading around the sides of the nose
- A few faint lines at the hairline
Keep these details sparse. Too many thick cracks can distract from the eye sockets and teeth.
8. Set your finished makeup
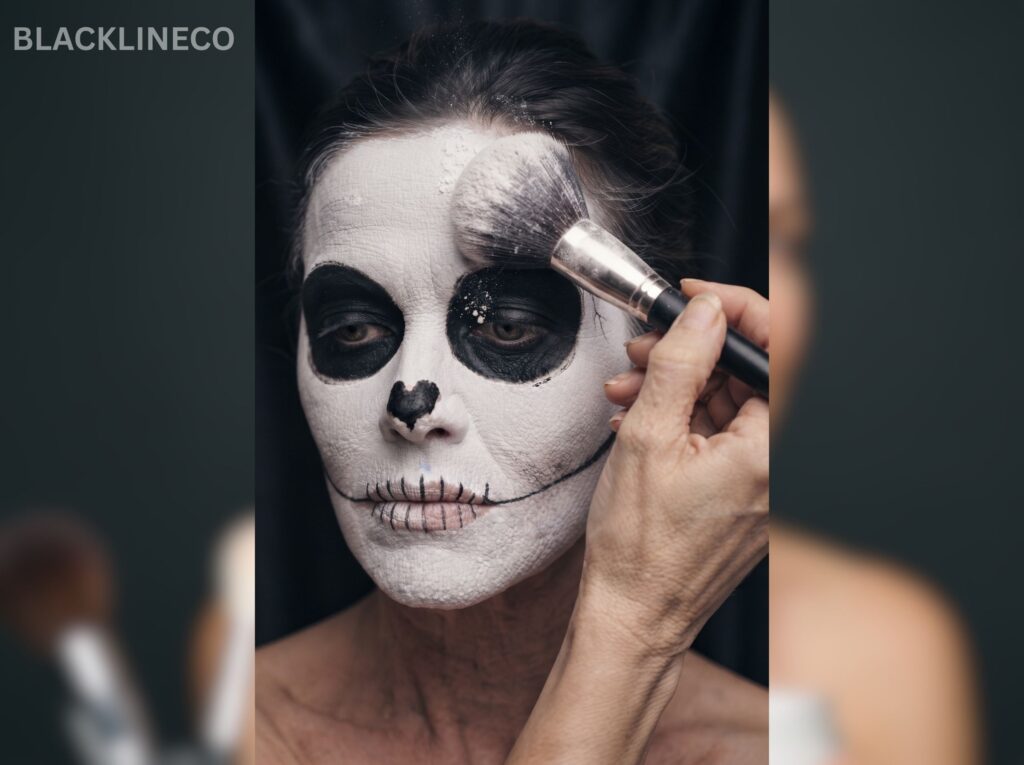
Press translucent powder gently over cream products. If you use powder makeup only, a setting spray can help hold the look in place.
Avoid rubbing your face once everything is set. Bring a cotton bud, a little black liner, and powder with you if you will be wearing the look for several hours.
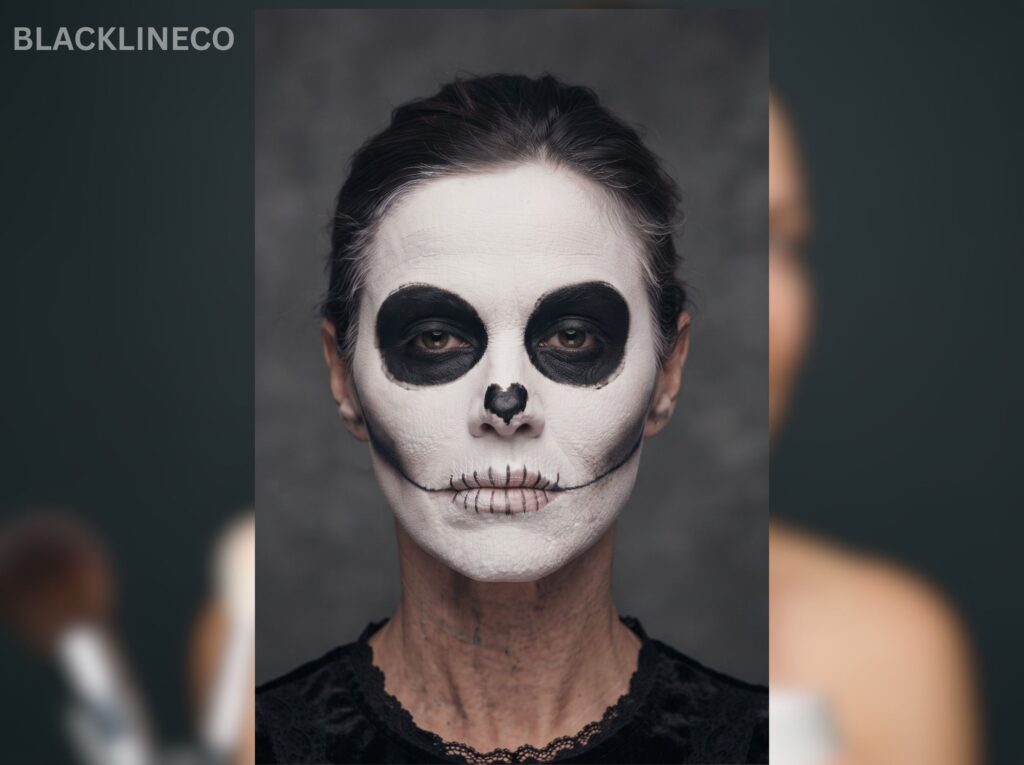
Easy skeleton makeup variations
Once you know the basic placement, you can change the mood of your skeleton costume without starting again. Pick one direction and let it guide your extra details.
Half-face skeleton makeup
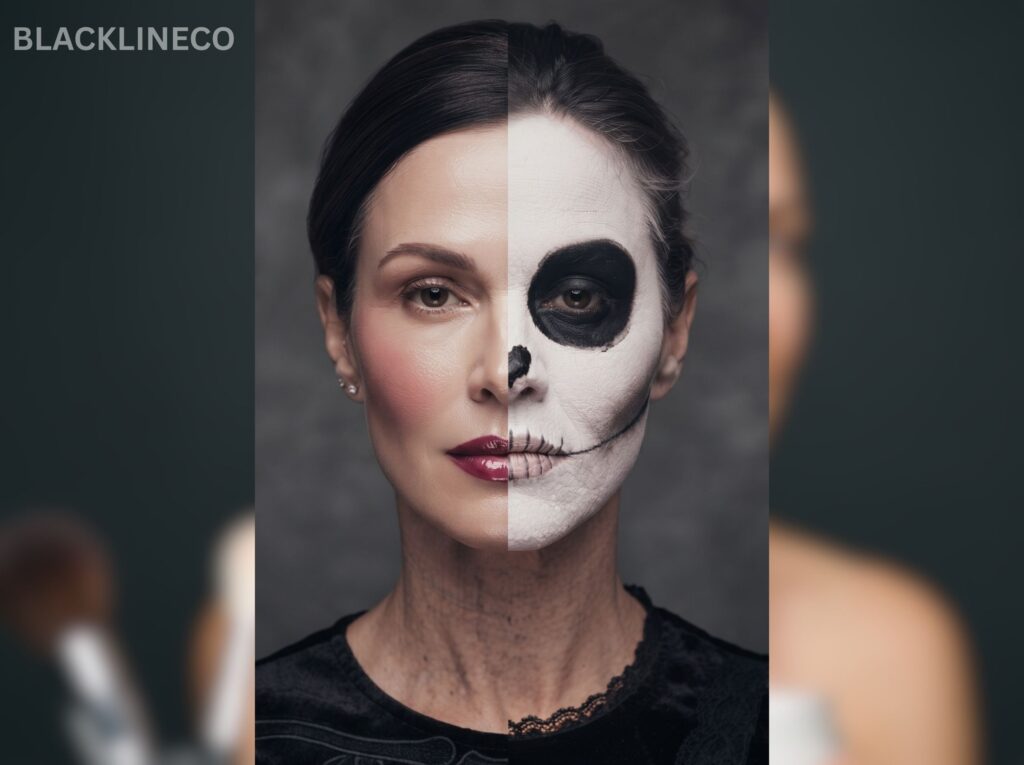
A half-face skeleton makeup look is ideal if you want Halloween makeup that still shows part of your usual makeup style. Paint one side of the face as a skull and leave the other side natural, glam, or softly contoured.
Use the bridge of the nose and centre of the lips as your dividing line. Keep one eye socket black, add teeth only across one side of the mouth, and blend the white base into the cheek or forehead.
This style looks especially effective with one dramatic eyeliner wing, a bold lip on the unpainted side, or a dark Halloween outfit.
Cute or glam skeleton makeup
For a cute skeleton makeup easy look, soften the harsh black-and-white contrast with shimmer, colour, or small decorative details.
Try one of these ideas:
- Blend pink, purple, silver, or burgundy eyeshadow around the black sockets
- Add glitter only if it is cosmetic-grade and approved for the intended area
- Use rhinestones around the eye socket edges with skin-safe adhesive
- Draw tiny hearts instead of sharp nose-cavity points
- Add lashes, glossy lips, or soft blush on the non-skeletal half of a half-face look
- Use white dots or stars on the forehead instead of cracks
Keep the eye sockets, nose, and teeth visible. Those three elements preserve the skeleton effect even when the rest of the look is colorful or pretty.
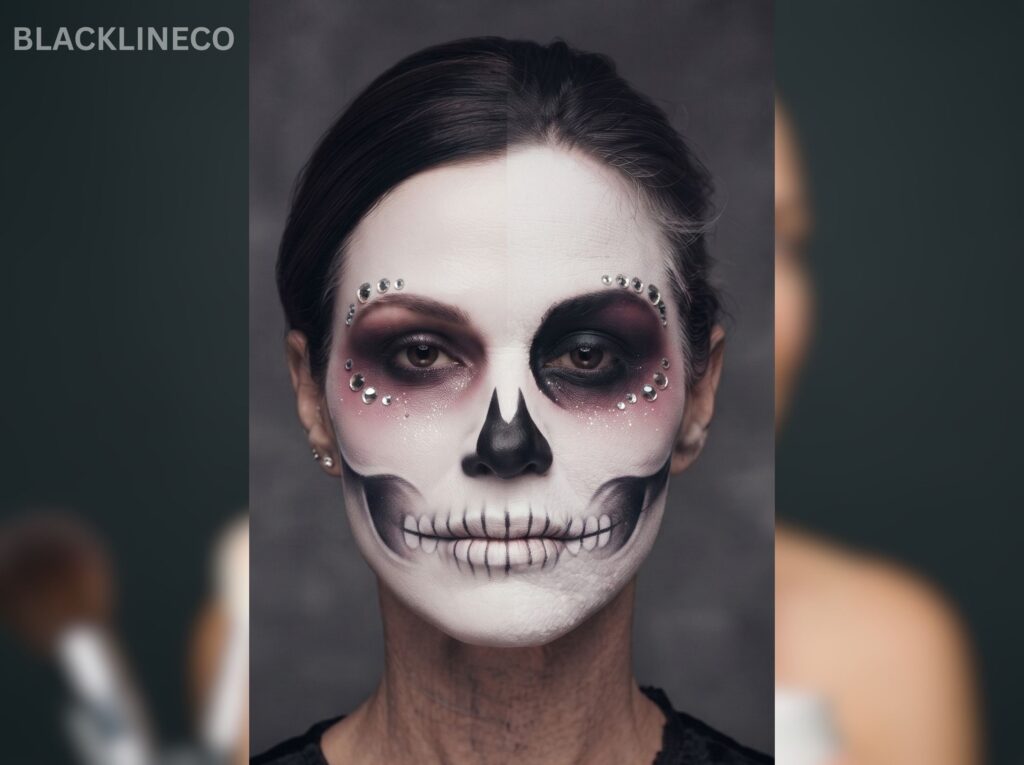
Scary skeleton makeup
For a darker skull makeup look, make the eye sockets larger, deepen the cheek hollows, and add thin crack lines around the forehead and mouth.
You can also extend black shading down the neck to create the beginning of a ribcage effect. Use grey shadow between the white base and black hollows for more depth. The goal is shadow and dimension, not simply covering every feature with black.
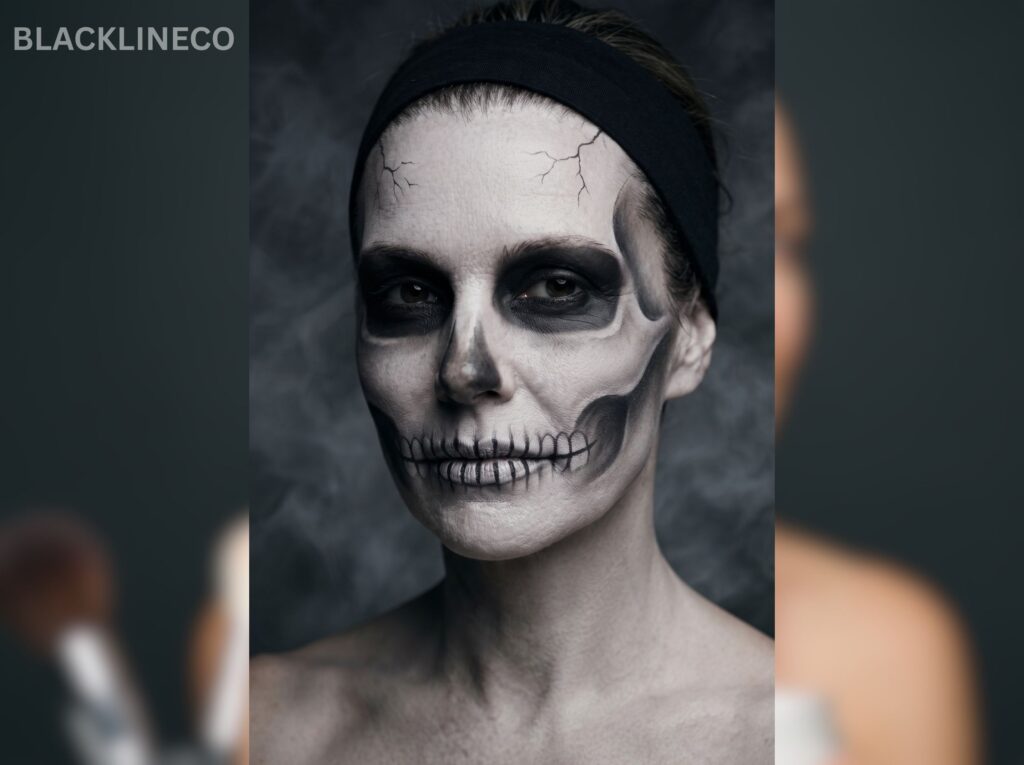
Easy skeleton makeup with eyeliner
No face paint? A black eyeliner pencil, liquid liner, and black eyeshadow can still create a convincing minimal skeleton.
Skip the full white base. Instead:
- Smoke out black eye sockets with eyeliner and eyeshadow
- Draw a small black nose cavity
- Use eyeliner to create the mouth line and teeth
- Add cheekbone contour using brown or grey shadow
- Finish with pale foundation, concealer, or powder around the edges if desired
This is a practical easy skeleton makeup no white option for people who already own everyday makeup and do not want to buy face paint for one event.
Skeleton makeup for men or facial hair
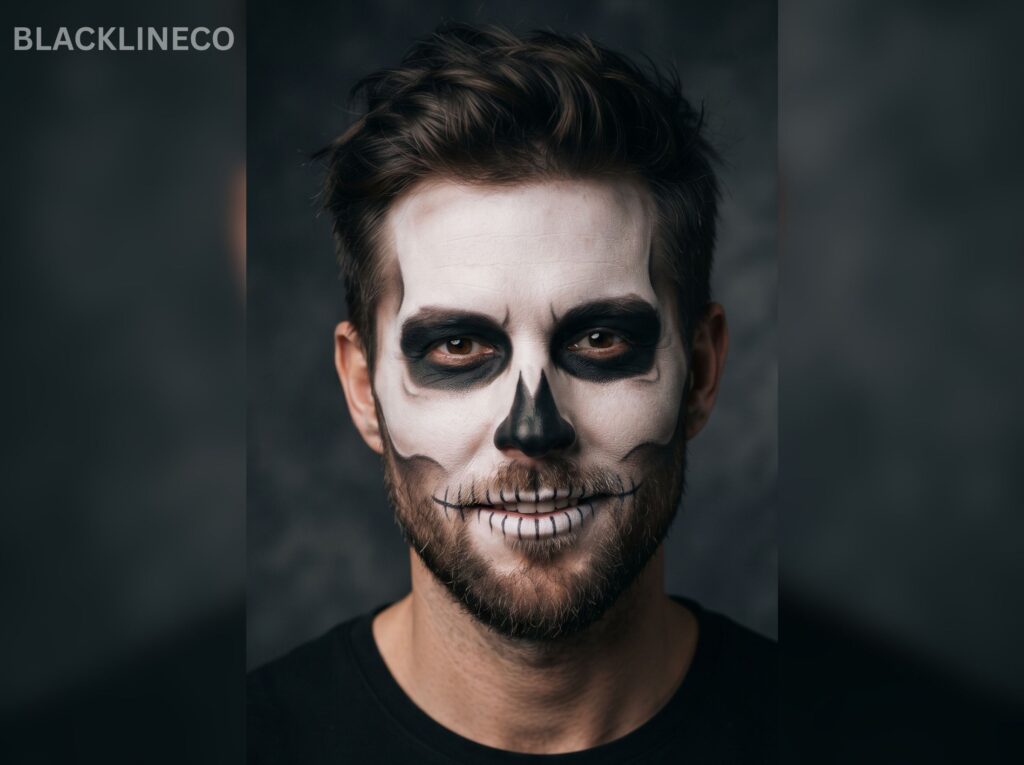
Easy skeleton makeup for men does not require a different design. The same eye sockets, nose cavity, cheek hollows, and teeth work for anyone.
If you have a beard or moustache, do not try to paint a thick white layer through dense hair. Instead, focus on the forehead, eyes, nose, upper cheeks, and lips. Add black shadow around the beard line to blend the skull shape into your facial hair.
For a beard-friendly look, keep the teeth on the lips and draw a few short white or black marks onto the upper beard area only if the product applies smoothly.
Common mistakes to avoid
The easiest way to improve skeleton makeup is to avoid making it too heavy too soon.
- Using one thick layer of white paint: Thin layers set better and are less likely to crack.
- Making eye sockets too small: Larger, rounded black hollows usually read better in photos.
- Drawing teeth while your mouth is open: Close your lips first so the design looks aligned when your face is relaxed.
- Using black only: Grey or brown blending creates more dimension around the eyes and cheekbones.
- Overloading the face with cracks: A few fine details look intentional; too many can look messy.
- Using unlabelled products around the eyes: Check cosmetic labels and keep products out of your eyes.
- Forgetting removal: Use a suitable makeup remover or cleansing balm instead of aggressively scrubbing the skin.
Frequently asked questions
How long does easy skeleton makeup take?
A very simple skeleton makeup look can take around 20 to 30 minutes once you know the basic placement. A full white base, shaded cheekbones, detailed teeth, and neck work may take closer to an hour. Beginner tutorials often describe the look as achievable in under an hour.
Can I do skeleton makeup without white face paint?
Yes. Use black eyeliner and eyeshadow to create dark eye sockets, a hollow nose, cheekbone contour, and teeth. A pale foundation or concealer can brighten selected areas, but it is not essential.
What is the easiest skeleton makeup look?
The fastest version uses three features: black eye sockets, a black nose shape, and a horizontal mouth line with vertical teeth marks. Add cheekbone shadow if you have another five minutes.
How do I stop skeleton makeup from cracking?
Apply thin layers of cream or face paint, set them with powder, and avoid piling too much product into smile lines. Moisturized skin and light pressing motions with a sponge also help create a smoother base.
Can I make skeleton makeup look glamorous?
Absolutely. Keep the traditional skull structure, then add lashes, shimmer, burgundy or purple shadow, rhinestones, metallic accents, or a polished half-face design. A glam skeleton still needs visible dark eye sockets, a nose cavity, and teeth to remain recognizable.
Final look
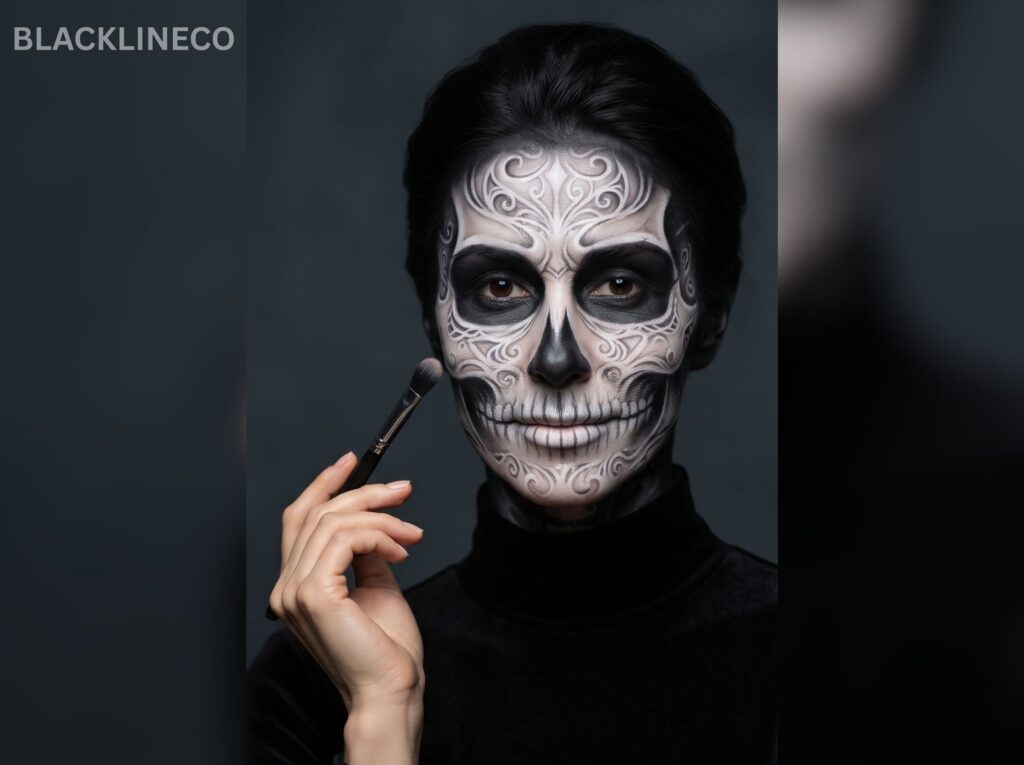
Easy skeleton makeup works because it relies on bold shapes, not complicated artistry. Start with black eye sockets, a simple nose cavity, shadowed cheekbones, and hand-drawn teeth. Once that base looks good, you can decide whether your Halloween skeleton should be scary, cute, colorful, glam, minimal, or half-face.
The best result is not the one with the most products—it is the one that feels comfortable to wear and still looks like you in the mirror.